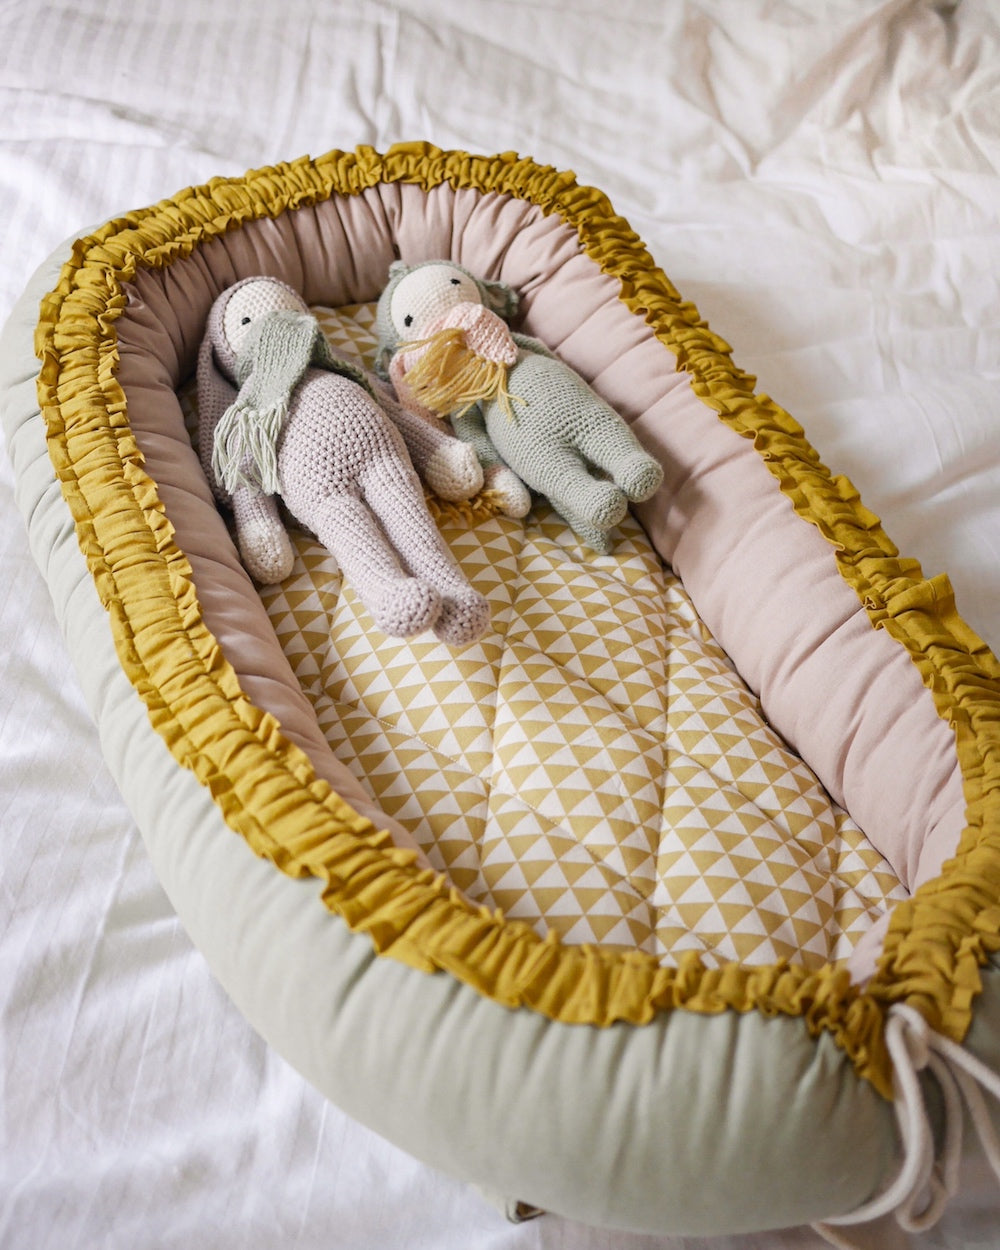
How to Make a Baby Nest in English
Every bit the Createaholic I am, when Simon and I found out that nosotros were going to take a baby I knew there were plenty of baby items I wanted to make myself. A baby nest is both very applied (well, then I've heard!) and cute. Furthermore, it isn't necessarily that complicated to make! There are several tutorials out there, and I browsed through a couple before ending upwardly making my own version based on a combination of different infant nest tutorials.
A thought before I explain how I made my baby nest. Make sure you choose the fabric with your baby in mind. I was choosing betwixt linen and cotton wool, and in the cease I went with Oeko-Tex Standard 100 certified cotton fabric because I couldn't discover adept linen fabrics that were both certified and soft. The certification guarantees that the fabric is free from harmful chemicals and substances, which is obviously important for your newborn babe. Earlier I started sewing the nest together (merely after I had cut out the parts and sewn the edges), I machine done the parts with baby friendly detergent, just to be actress sure and to make the material slightly softer.
One last thing. The tutorial will guide you in making a nest exactly as I fabricated it, which is with a removable cushion (forming the "walls" of the nest) and so that you can wash the nest easily. This requires sewing two zippers into your nest, which can probably exist a fleck tricky if you aren't that used to sewing. Only I will besides give yous the option to make an easier version without a removable cushion, so read through the steps before you start making the nest then you don't outset on whatever unnecessary steps. I used both a regular sewing auto and an overlock machine, but if you only have a regular one, just make sure yous sew the edges in another way (zig-zag for case) then the fabric doesn't unravel with fourth dimension.

You volition need:
- Paper to make cut outs
- ~ 100 x 70cm of fabric #1 (pink meridian)
- ~ 100 x 70cm of material #ii (dark-green lesser)
- ~ 100 x 70cm of fabric #3 (grey arched cushion - optional and requires zippers!)
- ~ 140 ten 80cm of textile #iv (patterned mattress)
- ~ 3m x 11cm of fabric #v (yellow binding). Alternatively a 4-5cm wide ribbon!
- ~ 3m of string/rope
- 2 ten 18cm long zippers (optional)
- Cobweb/down/wool filling for the sides (you tin can use the filling in pillows if you lot tin't find good filling, IKEA's for instance)
- Upholstery wadding/quilt batting for the mattress (you tin can also use the same filling equally for the sides, but the flat kind is easiest to distribute evenly in the mattress)
And of course:
- Sewing machine (and an overlock machine if you take i)
- Fabric scissors
- Pins
- Tape measurer
- Masking tape (optional)
The Pattern
Measure out the pattern on paper and make a cutting out based on these measurements. Alternatively, you lot tin can draw directly on the fabric, simply exist certain to add i-1.5cm seam allowance all effectually.

You will cut out these parts using the pattern:

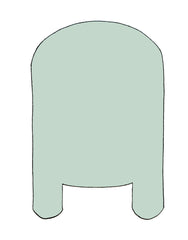
one of each (forepart and back)


If you are making a removable side cushion and volition be calculation zippers to your nest, you lot will cutting out 2 arched pieces. Finally, you will cut out ii pieces for the mattress.
Footstep one - cut out the parts

Apply the paper blueprint to measure the front and the back of the nest, making sure you add together at least 1cm seam allowance.

You should have one of each.

Take the paper blueprint and cut information technology then that you have the shapes for the side cushion and the mattress (the cushion should be 15cm wide all effectually). In case you are making the removable cushion for the sides (i.due east. adding zippers to your nest), cut two pieces for it with a seam allowance of 1cm.

Cutting out two pieces for the mattress, calculation 1cm seam allowance.

Cutting out the upholstery wadding/quilt batting slightly smaller than the mattress. Make at least 2 pieces, merely cut more if you feel the thickness isn't sufficient to make the nest soft and fluffy enough.
Stride 2 - arched cushion (only if you desire to be able to remove the cushion and volition add zippers to the nest)

Take the two pieces for the side absorber, stitch them together and sew forth the edges to go along them from unraveling. Brand sure you go along a petty bit open (see top correct corner) to be able to plow the absorber inside out and add filling.

In one case you have added the filling, pin the opening and stitch it close, either using your machine or past hand.

What your side cushion should look like.
Pace iii - sew together together front and back
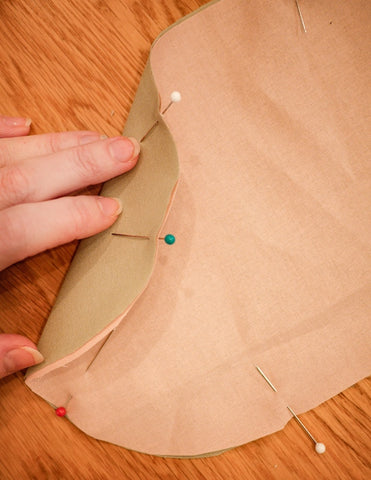
Pivot the front and back together.

Sew the pieces together along the dotted line and make sure to sew along the edges as well, including the edges that are kept open (run into photo below).

If you are adding zippers, run up them onto the nest as shown in the photo and illustration. If you aren't using zippers, just leave these parts open for now.

Step 4 - yellow bounden/lace/ribbon
To make the binding in which the string/rope will be inserted, have the three metres long and 11cm broad piece of fabric (y'all can join several parts if y'all can't cut out a 3m long piece) and fold it in one-half, along its long side. Sew together information technology together and turn it within out (requires a bit of work, I know). If y'all want, you tin can fe the long slice so that the seam is in the heart as shown in the photo below. Fold in the edges on each side and sew them shut.
Note: making the binding ruffled can be complicated if you oasis't used this method before. You can just likewise only keep it straight and pin it directly onto the sides of the nest. If you want information technology ruffled, here's a video I found that explains this method.
To ruffle the binding, increase the stitch length to the longest possible and then sew along the sides of the bounden. Make certain yous have long thread ends sticking out on both ends of the binding.


Sew 2 more lengths next to the previous stitches, making a total of iv lengths. Hold the 4 threads coming out on the same side of the binding and start ruffling your bounden.

When it is long plenty, pin it to the side of your nest (make certain y'all have turned it right side out), covering the seam where the forepart and dorsum are sewn together.

The ends of the binding should be placed on the "edges" of the two points on the nest.

Sew the bounden onto the nest, making sure the nest is direct and doesn't curve or fold anywhere. Stitch once on the left side and in one case on the right side, making sure the space in the centre is wide enough to pull the cord/rope through.
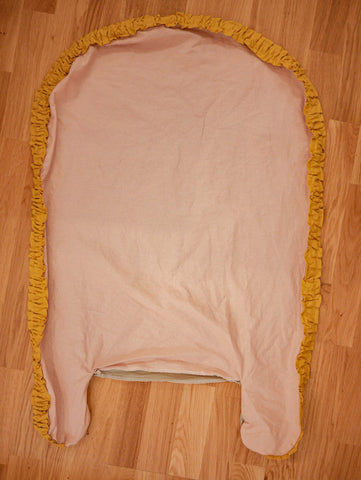
Remove the pins and pull out the threads yous used to ruffle the binding.
Step 5

Apply the paper pattern over again to draw out where to sew the sides shut.

You should not add together any seam allowance!

Lay the nest flat and pivot the front and back together. Sew along the fatigued line (the dotted line in the illustration).

Step 6 - add together the wadding

Insert the wadding/batting into the nest. Once you are happy with its placement, pin and sew the bottom shut, as shown in the illustration.


To make sure the wadding stays in place when you demand to wash the nest, I pinned the center role as shown in the photo and used a needle and thread to sew ten:es through the front and back by hand.


This is what information technology looked like when I was done.
Step vii - insert the side cushion

One matter I would have washed differently is to pull through the rope/string before inserting the cushion. Don't make the aforementioned fault I did! ;)
Once the rope/cord is in place, insert the cushion through the sides. Start pulling from the other side once information technology feels okay to do so. Be careful non to intermission any seams!
If you skipped the zippers, at present is the time to stuff the sides with filling and once y'all are happy with the corporeality, pivot and sew the sides shut.
Step 8 - make the mattress
Take the two pieces for the mattress and pin them together.

Sew the edges together every bit shown in the illustration, leaving the bottom open.

Plough the mattress correct side out and insert the wadding.

Fold in the edges, pivot and sew the bottom shut.

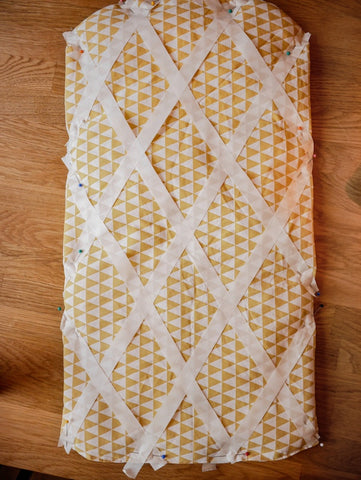

To brand the wadding stay in place when the mattress needs washing, I sewed a criss-cross pattern over the mattress. I used masking tape to plan out the blueprint and then sewed across the tape every bit shown in the photo below.


Once yous are done, remove the tape!
Congratulations, your baby nest is finished! :)


Y'all tin can cull which side to use equally lesser and which to employ equally the acme!


I promise you enjoyed this tutorial! <3
Are y'all new here? My name is Fanny Zedenius and I run a fiber art concern in Sweden called Createaholic. Y'all can find my two best selling books about macramé here and you tin can bank check me out on Instagram here. On this website I sell all the supplies you need to get started on your fiber fine art journey - be it macramé, weaving, crocheting or something else! I besides occasionally post new blog posts where I share some of the creative projects I piece of work on.
I hope you'll like your stay here in my corner of the Internet!
Honey, Fanny
Source: https://createaholic.se/blogs/blog/make-your-own-baby-nest
0 Response to "How to Make a Baby Nest in English"
Enregistrer un commentaire